How to Ground an Electric Fence?
Electric fences offer excellent security and containment for livestock and property. However, their effectiveness hinges on proper grounding. At KKR Fencing & Outdoor Services LLC, we've installed countless electric fences since 2017, and we know firsthand the critical role grounding plays. This guide will walk you through the process of grounding an electric fence, ensuring optimal performance and safety.
Understanding Electric Fence Grounding
Grounding creates a complete circuit for your electric fence. When an animal or intruder touches the fence, the electrical current travels through them, into the ground, and back to the energizer via the ground rods. Without proper grounding, your fence won't deliver an effective shock, rendering it useless.
Many people mistakenly believe that simply sticking a rod in the ground is sufficient. In reality, effective grounding requires careful planning and execution, similar to the expertise we apply in our residential fence installations.
Essential Tools and Materials
Before you start, gather these tools and materials:
- Ground rods (galvanized steel, 6-8 feet long)
- Ground rod clamps
- Grounding wire (12.5 gauge galvanized steel)
- Fence energizer
- Voltmeter
- Post hole digger or ground rod driver
- Wire strippers and cutters
- Safety gloves and goggles
Step-by-Step Guide to Grounding an Electric Fence
1. Choosing the Right Location
Select a spot with moist soil, ideally away from buildings, buried utilities, and septic systems. The ground rods should be at least 10 feet from the fence line and energizer.
Soil tip: Clay soils conduct electricity better than sandy soils. If you have sandy soil, you may need additional ground rods.
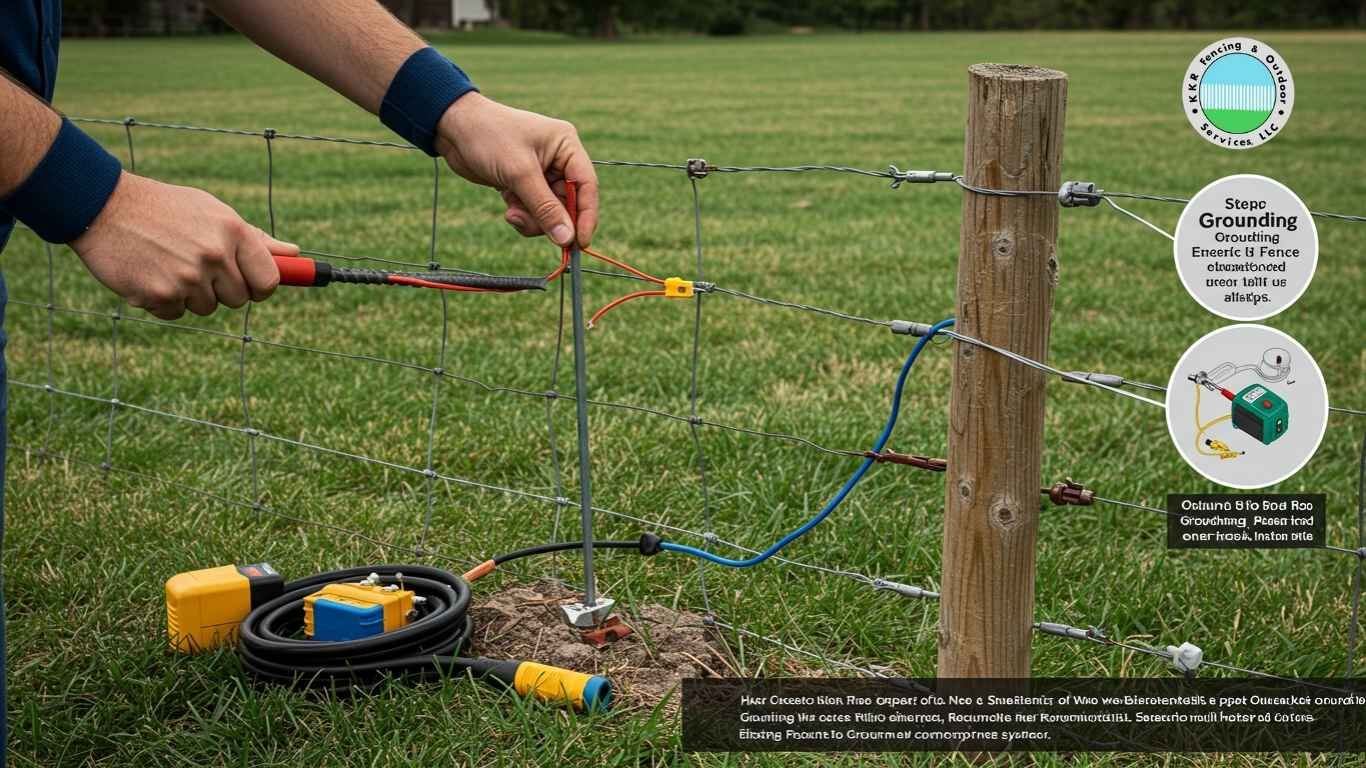
2. Installing Ground Rods
Drive the ground rods into the earth, leaving about 6 inches exposed. Space multiple rods at least 10 feet apart. For optimal grounding:
- Use at least three ground rods
- Drive rods to a minimum depth of 6 feet
- Ensure rods are straight and vertical
Technique for hard soil: If you encounter rocks or hard soil, soak the area with water before driving the rod. Never cut or bend the rod to make installation easier.
3. Connecting Ground Rods
Connect the ground rods using a 12.5-gauge galvanized wire. Strip the wire ends and secure them to each rod using ground rod clamps. Ensure all connections are tight and corrosion-free.
Pro tip: Create a continuous grounding system by running the wire from the first rod to the last, then back to the energizer. This "daisy chain" configuration improves grounding efficiency.
4. Attaching Fence Energizer to Ground System
Connect your fence energizer to the grounding system:
- Locate the ground terminal on your energizer
- Attach the grounding wire from your rod system to this terminal
- Ensure a secure, corrosion-free connection
Safety first: Always disconnect the energizer from its power source before making any connections.
5. Testing Your Grounding System
Use a voltmeter to test your grounding:
- Short out the fence about 100 yards from the energizer by laying metal rods or pipes against it
- Measure the voltage between the last ground rod and a temporary ground rod driven about 3 feet away
- If you read more than 0.3 kV, your grounding needs improvement
Interpreting results: A reading above 0.3 kV indicates that too much current is returning through the soil instead of your ground rods. Add more ground rods until the reading drops below 0.3 kV.
Troubleshooting Common Grounding Issues
Poor grounding often manifests as weak shocks or no shock at all. Common issues include:
- Insufficient ground rods
- Dry or sandy soil
- Corroded connections
- Broken grounding wire
To resolve these:
- Add more ground rods
- Water the soil around ground rods during dry periods
- Clean or replace corroded connections
- Inspect and replace any damaged grounding wire
Maintenance Tips for Electric Fence Grounding
Regular maintenance ensures your electric fence remains effective:
- Check connections monthly for corrosion or looseness
- Test fence voltage regularly
- Inspect grounding system after storms or earth disturbances
- Keep the area around ground rods clear of vegetation
Seasonal check: Test your grounding system at the start of each season, especially after winter, when frost heave can affect ground rod placement.
Safety Considerations
Electric fences can be dangerous if not handled properly. Always:
- Wear insulated gloves when working on the fence
- Use warning signs to alert people to the electric fence
- Keep children and pets away during installation and maintenance
- Check local regulations regarding electric fence use and installation
Legal note: Some areas have specific requirements for electric fence installation and use. Always check your local laws before installing an electric fence.
Conclusion
Proper grounding is crucial for electric fence effectiveness and safety. By following this guide, you can ensure your electric fence functions optimally, providing security and containment as intended. Remember, while DIY installation is possible, professional installation guarantees compliance with safety standards and optimal performance.
If you're considering other fencing options, explore our chain-link fencing or wood fencing services. For existing fences needing attention, check out our fence repair services. We've been providing top-notch fencing solutions since 2017. Our team of experts specializes in electric fence installation and maintenance, ensuring your property remains secure and your livestock is contained.